


Technically, in Linux systems, there are two types of variables: shell and environment.
- Environment variables are dynamic named values, stored within the system that are used by applications launched in shells or subshells and are inherited by any child shells or processes.. They allow Linux administrators to customize how systems work as well as application behavior. Environment variables can store information about the default text editors, browsers, the paths to executable files, or system locale and keyboard layout.
- Shell variables, on the other hand, are typically listed in lowercase and are only valid in the shell they are set in.
Although considered complicated, variables are text/strings in key-value pairs; each pair looks like KEY=value and where there are multiple values, it looks like KEY=value1:value2. Also, if there are spaces in the value, it needs to be contained in quotation marks.
Variable Conventions
- The names of the variables are case-sensitive. By convention, environment variables should have UPPER CASE names;
- When assigning multiple values to the variable they must be separated by the colon : character; and,
- There is no space around the equals “=” symbol.
Viewing and Modifying Environment Variables
There are several commands you can use to list and set environment variables in Linux:
env: Allows you to run another program in a custom environment without modifying the current one. When used without an argument it will print a list of the current environment variables.
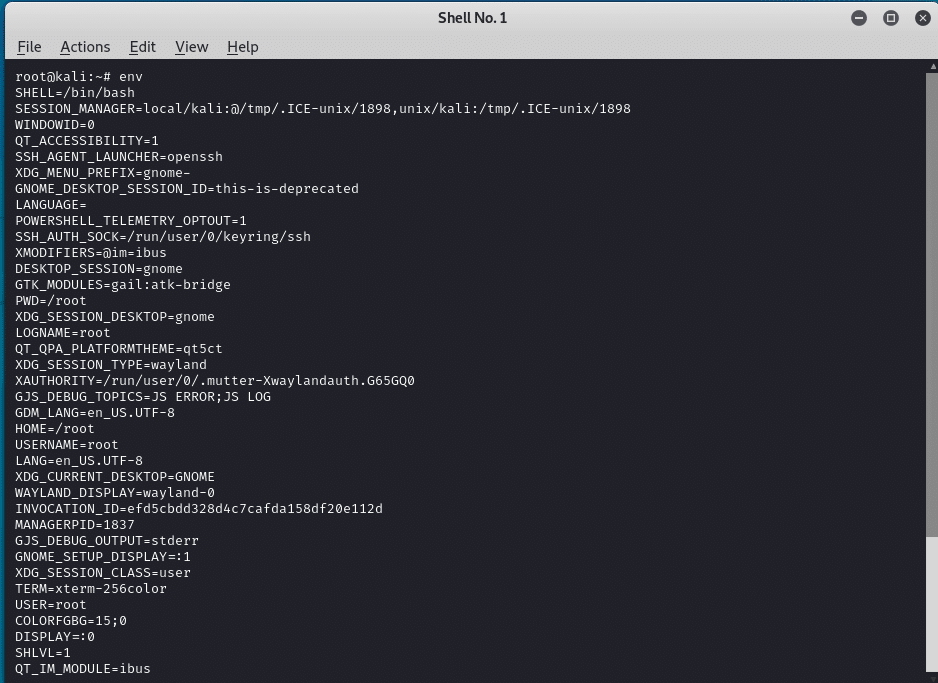
Environment variables are always uppercase, as in HOME, PATH, SHELL, and so on. These are only the default environment variables that come on your system. Users can also create their own variables. Below are some of the most common environment variables:
USER – The current logged in user.
HOME – The home directory of the current user.
EDITOR – The default file editor to be used. This is the editor that will be used when you type edit in your terminal.
SHELL – The path of the current user’s shell, such as bash or zsh.
LOGNAME – The name of the current user.
PATH – A list of directories to be searched when executing commands. When you run a command the system will search those directories in this order and use the first found executable.
LANG – The current locales settings.
TERM – The current terminal emulation.
MAIL – Location of where the current user’s mail is stored.
printenv: Prints all or the specified environment variables.
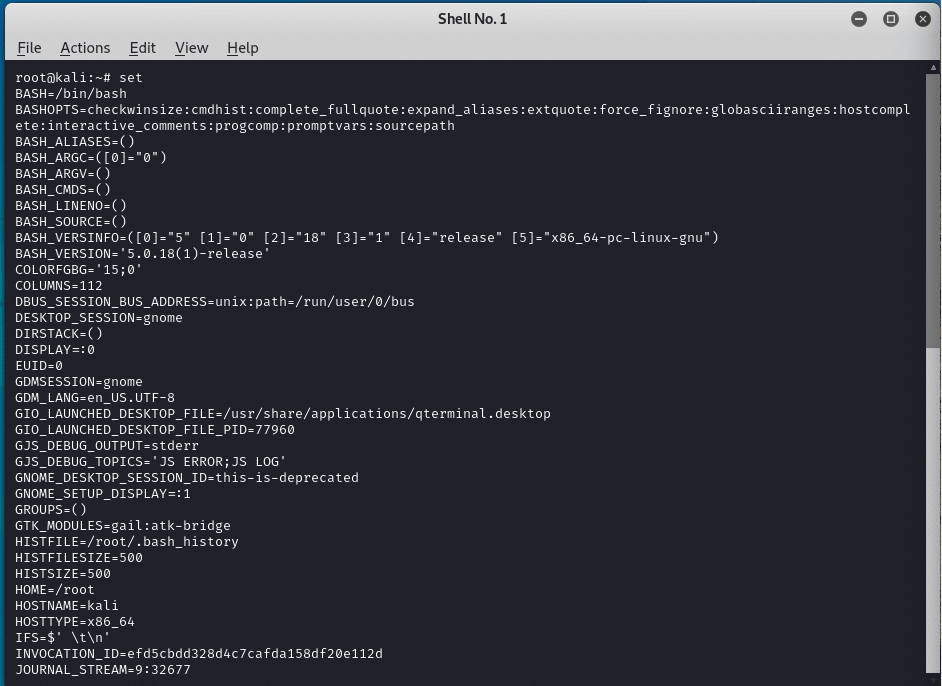
set: Sets/unsets shell variables. When used without an argument it will print a list of all variables including environment and shell variables, and shell functions.
unset: Deletes shell and environment variables.
export: The command sets environment variables.
set:Viewing All Environment Variables
The “set” command allows you to view all environment variables, including:
- Shell variables;
- Local variables; and
- Shell functions such as any user-defined variables and command aliases.
As the “set” command lists all environment variables so you usually get an output so long that the screen overflows, so you can use it in conjunction with the “more” command ( eg. “set | more”) in order to view the output line by line.
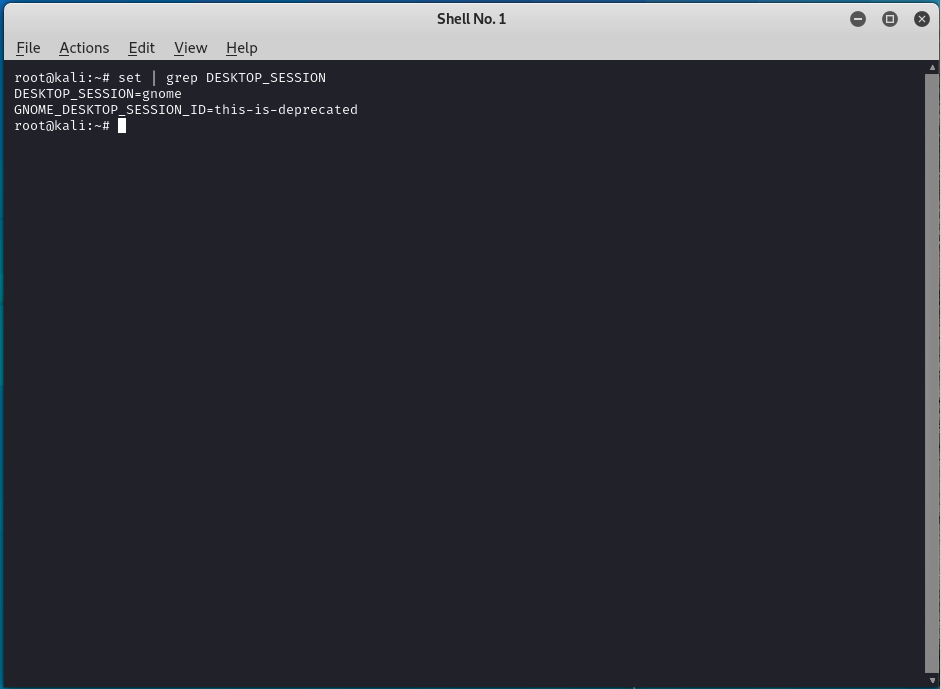
grep: Filtering for Particular Variables
Sometimes it is quicker just to use the “grep” command to find the environment variable you are looking for. Let’s give this a try using the DESKTOP_SESSION variable, which sets the desktop environment, which in this case is “gnome” Pipe the output of the “set” command to grep to find the DESKTOP_SESSION variable.
set: Changing Variable Values for a Session
When needed, users can change a variable’s value. Working with the HISTSIZE variable, which contains the value of the number of commands to store in the history file, you can set it to “10” so the system won’t store many of your past commands. You can change the variable like this:

export: Making Variable Changes Permanent
When you change an environment variable, that change only occurs in that particular environment, in this case the shell session; when the terminal closes, any changes you made are lost and values return to their defaults. In order to make changes permanent, use the “export” command, which exports the new value from the current environment to the rest of the system, making it available in every environment. Before you start tinkering with your environment variables, its a good idea to export them to a text file with the following command and then export the HISTSIZE variable:
- “env > env.txt”
- export HISTSIZE
Now the HISTSIZE variable will still be set to 10 when you enter another environment. If you want to reset the HISTSIZE variable to 1,000, simply enter this:
HISTSIZE=1000
export HISTSIZE
This code snippet will set your HISTSIZE variable’s value to 1,000 and export it to all your environments.
Changing Your Shell Prompt
The shell prompt provides information such as the:
- User you’re operating as; and,
- Directory in which you’re currently working.
The default shell prompt in Kali takes the following
format: username@hostname:current_directory
By setting the values for the “PS1” variable, you can alter the default shell prompt by setting the value for the PS1 variable. The PS1 variable contains placeholders for information displayed in the prompt, including the following:
- \u The name of the current user;
- \h The hostname; and,
- \W The base name of the current working directory.
A descriptive command prompt is useful if you have shells on multiple systems or login on as multiple accounts. By setting different \u and \h values for different shells or accounts, you can tell at a glance who you are and what your current system is. Let’s change the prompt in your terminal to “Facebook Sucks”.

Remember, that since you have not exported the changes, subsequently opened terminals still have the default command prompt, because the PS1 variable only holds val-ues for your terminal session. If you want this new command prompt in every terminal, you need to export it with the following command:
export PS1
This will make the change permanent across all sessions.
Changing Your PATH
The “PATH” variable is the most important variable in your environment as it controls where on your system your shell looks for the commands you enter. Commands are usually located in the sbin or bin subdirectory, like /usr/local/sbin or usr/local/bin. If the bash shell doesn’t find the command in one of the directories listed in the “PATH” variable, it will return the error “command not found”. You can view which directories are stored in your PATH variable (be sure to include the $) by “echoing” its contents.

You can now see the directories, each separated by a colon “:”, where the terminal searches for the commands you enter, which when found, are executed.
Adding Directories to the PATH Variable
Adding directories to PATH can be useful for directories you use often, but do not to add too many directories to your PATH variable as the system will search through each and every directory in PATH to find commands, so adding a lot of directories slows down the terminal’s performance. If you downloaded and installed a new tool, “newlydownloadedtool” into the “/root/newlydownloadedtool” directory, you could only use that tool’s commands in that directory because as that directory is not stored in the PATH variable. In order to remedy this issue and use the tool from any directory, add the relevant directory to the PATH variable.
To add newlydownloadedtool to the PATH variable, enter the following:
PATH=$PATH:/root/newlydownloadedtool
This command assigns the original PATH variable plus the /root/newlydownloadedtool directory to the new PATH variable, so the variable contains the original contents of the variable, plus the new tool directory.
When you query the PATH variable again, this directory has been appended to the end of PATH, as shown here:
echo $PATH /usr/local/sbin:usr/local/bin:/usr/sbin:/sbin/bin:/root/newlydownloadedtool
Now you can execute newlydownloadedtool applications from anywhere on your system, rather than having to navigate to its directory. The bash shell will look in all directories listed for your new tool.
WARNING: How Not to Add to the PATH Variable
A common mistake is assigning a new directory, such as /root/newlydownloadedtool, directly to the PATH variable like this:
PATH= /root/newlydownloadedtool
By doing this and not including “$PATH:” the PATH variable contains only the /root/newlydownloadedtool directory and no longer contain the system binaries direc- tories such a that hold critical commands. When you then go to use any of the system commands, you’ll receive the errorcommand not found, as shown next, unless you first navigate to the system binaries directory when you execute the command. Remember that you want to append to the PATH variable, not replace it. If you’re in doubt, save the contents of the variable somewhere before you modify it.
Creating a User-Defined Variable
Creating custom, user-defined variables in Linux is accomplished assigning a value to a new variable that you name. This comes in handy when doing advanced shell scripting. The syntax of creating custom defined variables is simple:
- Enter the name of your variable;
- Followed by the assignment symbol (=); and,
- The value to put in the variable.
NEWUSERDEFINEDVARIABLE=”This is a string”
This assigns a string to the variable NEWUSERDEFINEDVARIABLE. To see the value in that variable, use the echo command and the $ content symbol with the vari- able name, as we did earlier:
echo $NEWUSERDEFINEDVARIABLE
This is a string
As with system environment variables, user-defined variables must be exported to persist to new sessions.
unset: Deleting Variables
Deleting variables involves invoking the “unset” command, but be cautious before deleting system variables, though, because your system will probably operate much differently afterward.
unset MYNEWVARIABLE
echo $MYNEWVARIABLE
This echo statement will produce no response because there is no value associated with the variable. Unsetting a variable deletes the variable along with its value. If you use echo on that same variable, Linux will now return a blank line.


